Yoga Basics is a series that features the more fundamental poses in yoga. Expect to learn about the benefits, alignment and common misalignments, modifications, and contraindications. It is not just for beginners, but for anyone wanting to dive deeper into the practice.
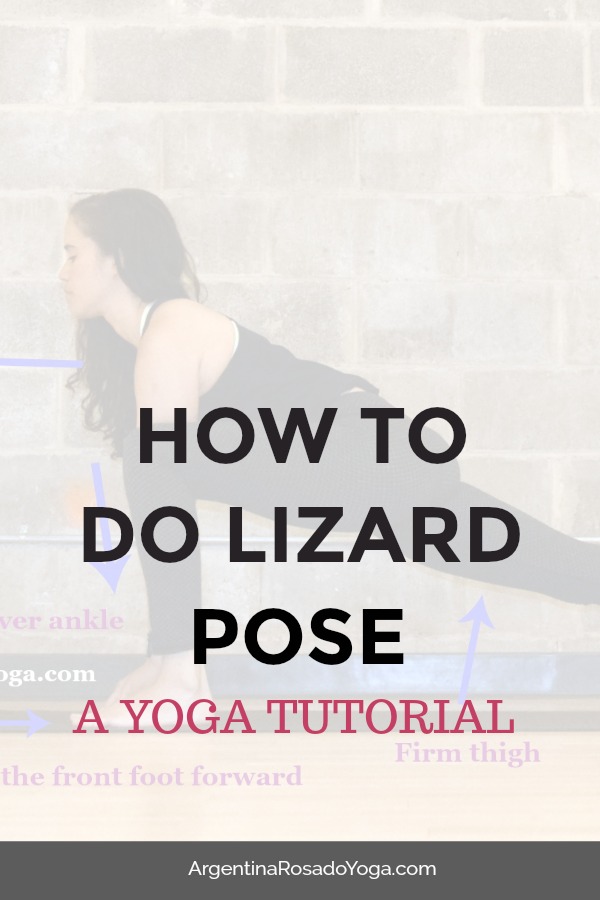
Lizard Pose (Utthan Pristhasana)
Lizard used to be one of those poses that would make me cringe at just the thought of it. It was too uncomfortable to hold, especially for someone with chronically tight hips like, well, me.
Looking back now, after years of practice, and now teaching, I’ve realized what was happening. I was trying too hard. I would force myself into the pose when my body was clearly not ready for it. As a result, I would not only harm my body, but also not get the benefits of the pose.
But, it doesn’t have to be that way. With the use of props, modifications, patience, self-awareness, and most importantly self compassion, you can make even the most challenging and uncomfortable poses work for you, not the other way around.
Let’s take a look at Lizard pose.
What’s it for?
Lizard pose is wonderful way to open the psoas muscle (hip flexors). The hip flexors become active in activities such as walking, standing, running, cycling, and sitting. These activities are done almost every single day and as a result, the hip flexors become tight in most people. The pose also strengthens the hamstring (front leg), and glutes (back leg). In deeper variations, Lizard pose may also be used to open the quadriceps (back leg).
How-to:
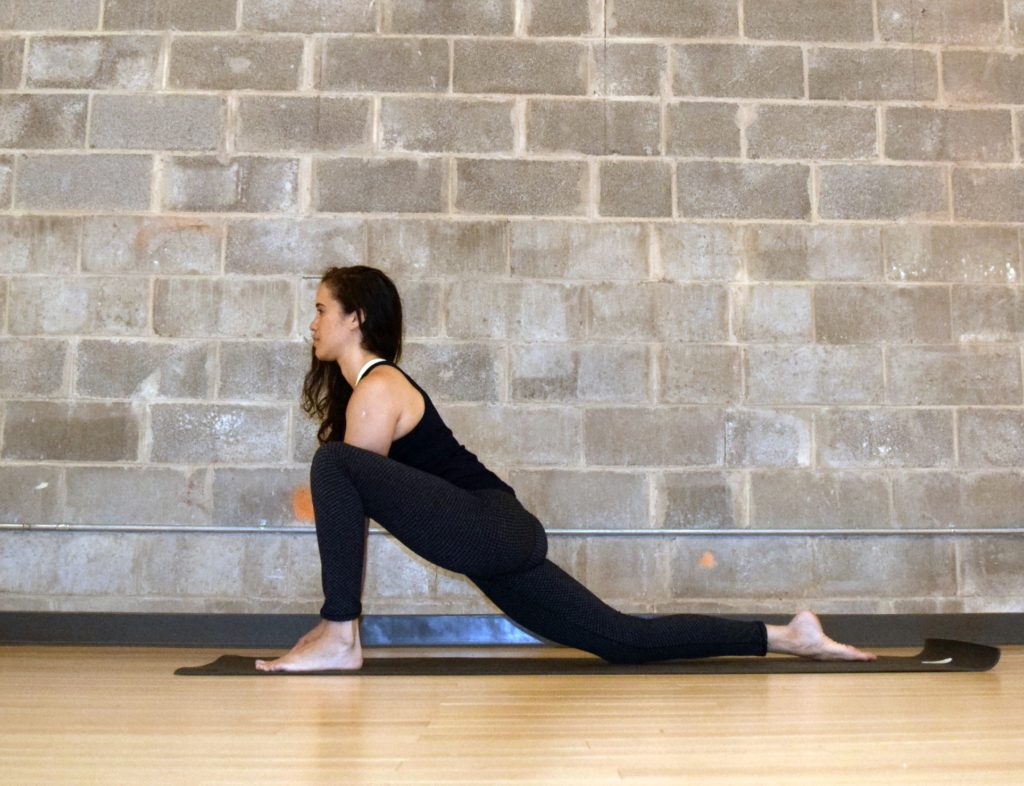
From downdog or tabletop position (hands and knees), step your right foot forward and place it between your hands. If the foot doesn’t get there right away, walk it forward little by little. Take your time, but don’t just leave the foot back there stranded (see common misalignments).
Walk the foot about 3 inches to the right, so that both arms are on the inside of the foot.
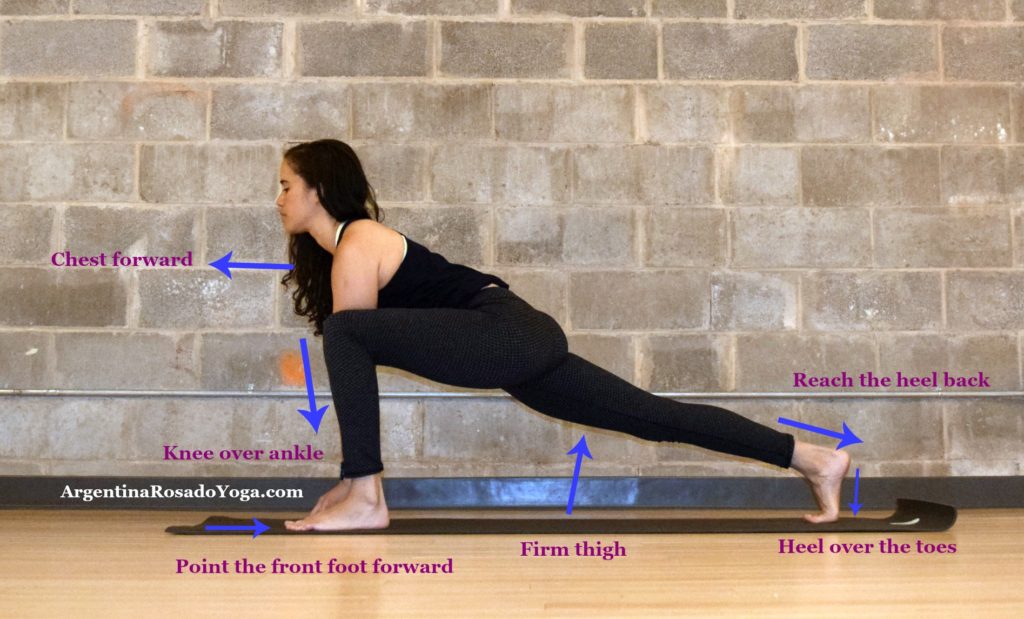
Be sure that the knee is directly over the ankle, and that the front foot is pointing forward.
On the back leg, keep the thigh firm, reach the heel back (imagine you were pressing it up against a wall), and keep the heel over the toes.
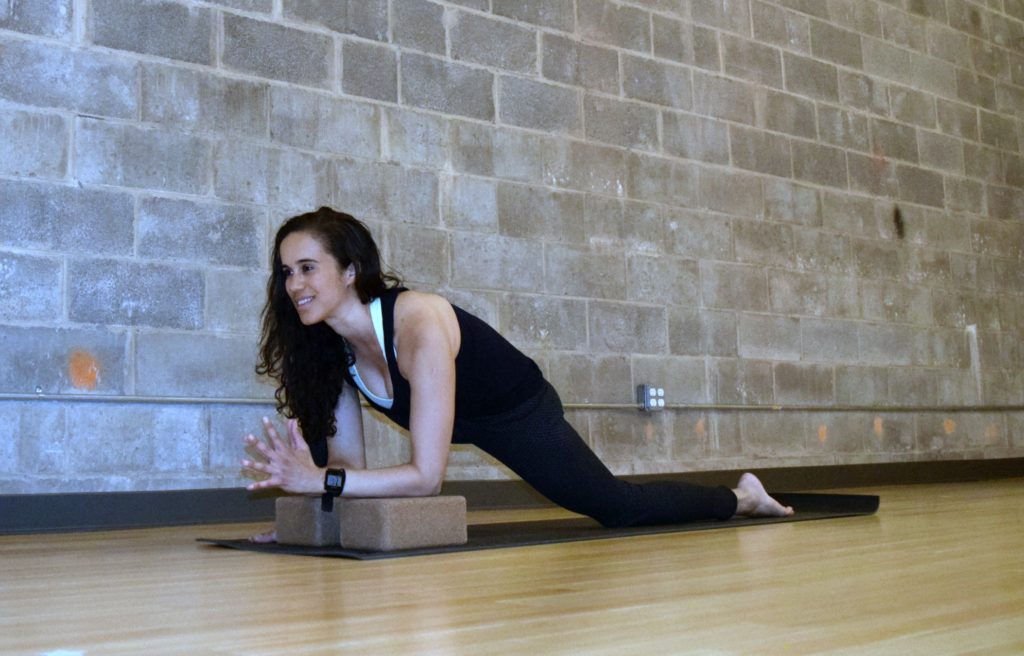
Keep your arms straight with your chest reaching forward. Or, lower your forearms to the floor, making sure not to round the back forward. If this happens, grab a couple of blocks to create some height and keep your chest lifted. (see modifications).
Modifications
1. Lower the back knee
From downdog or tabletop position (hands and knees), step your right foot forward and place it between your hands.
Lower the back knee to the ground, slide it back a couple of inches, and point the back toes.
Keep your arms straight and chest reaching forward.
2. Use blocks
Grab a couple of blocks and place them on the inside of the front foot, adjusting the height to your needs. Again, keep the arms straight or lower forearms to the blocks.
3. Add padding
If you have sensitive knees, add padding to the back knee (either a blanket, bolster, or folded towel). You can also double up your mat.
Common Misalignments
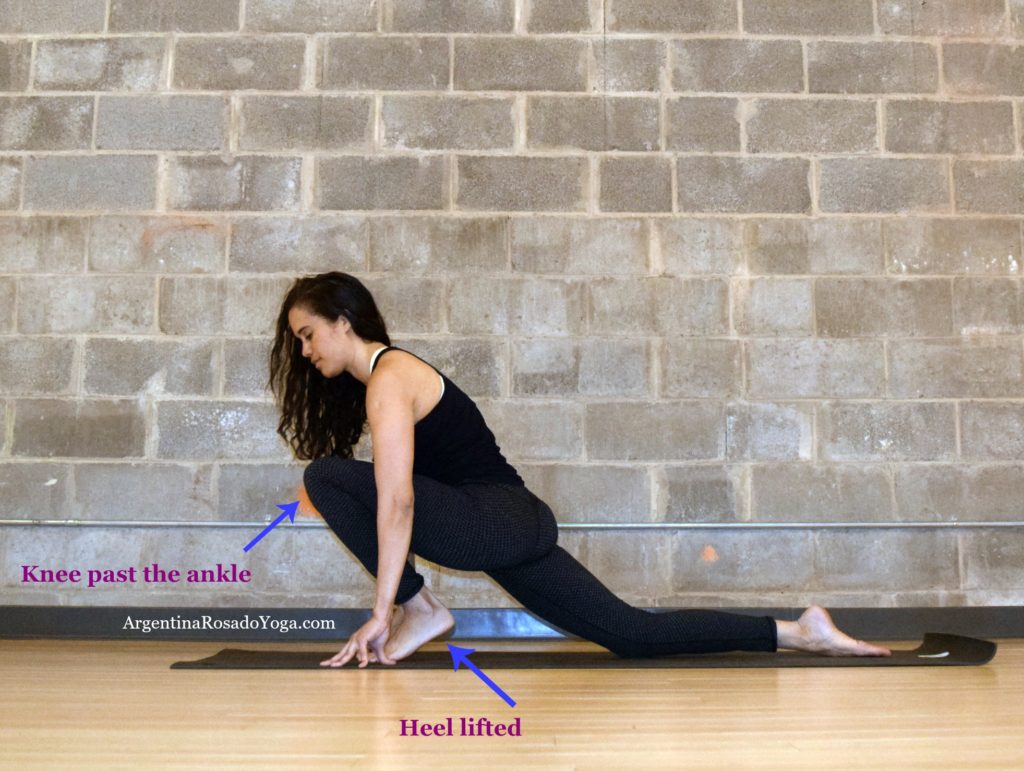
1. The knee is way past the ankle
Sometimes, the foot doesn’t get there right away when you try to step it forward between the hands. This is very common. But, what I see is that people usually leave the foot back there stranded and then go on with their practice. Or, they bring the hands back to frame the feet, instead of the foot forward. This causes the foot to stay way behind the knee, and the heel to stay lifted.
Instead, take the time to step that foot forward, slowly but surely. Bring it forward so that the knee is directly over the ankle, the foot is firmly planted and pointing straight forward. The wrists (or elbows if doing it on the forearms) should be directly under the shoulders.
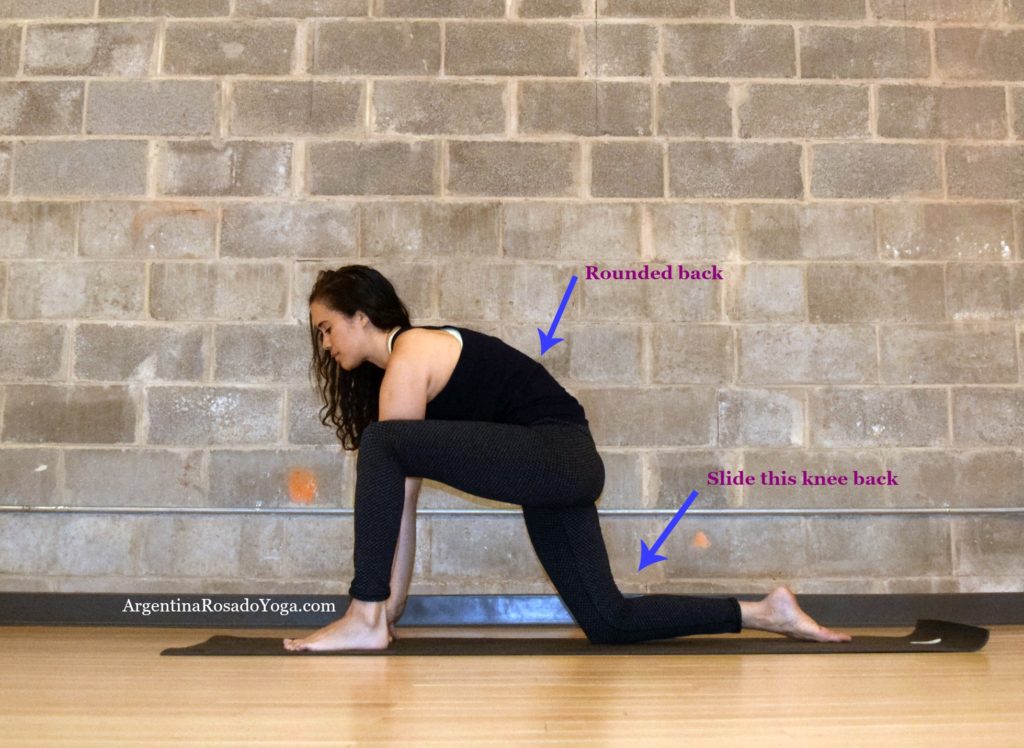
2. The back is rounded
Sometimes we can’t reach the floor properly, due from either tight hips or for anatomical reasons. Some practitioners force their way down causing their back to round forward and chest to sink in.
To modify this, use blocks to create height. Adjust the height of the blocks as needed to keep the chest reaching forward and avoid over-rounding the back.
Another reason why the back rounds is not sliding the back knee back. When you step the foot forward between your hands, slide the back knee back a few inches. This will create space along your spine and activate the stretch of the hip flexors.
Very useful info! I loved the pictures with all the details on how each part of the body should be aligned/ positioned. It definitely helps me correct those little mistakes that I wouldn’t be able to notice otherwise!
Such a great post – I love lizard but this is really helpful for me to check my alignment! Thank you!