
You know those days when you get home tired and don’t really feel like taking a trip to the yoga studio? Those days when you’ve had a super long day and your body’s screaming at you for some TLC?
As a New Yorker AND yoga teacher who walks miles and climbs hundreds of stairs per day, I get you. In fact, this is me almost everyday.
I have my own little yoga ritual for days just like this and it involves super yummy yoga poses. It’s like hitting some kind of “reset” button.
The poses below are my absolute favorite. They are simple, but oh so powerful. You will just need a yoga mat, or something to lay down on.
Downward-Facing Dog (Adho Mukha Shvanasana)
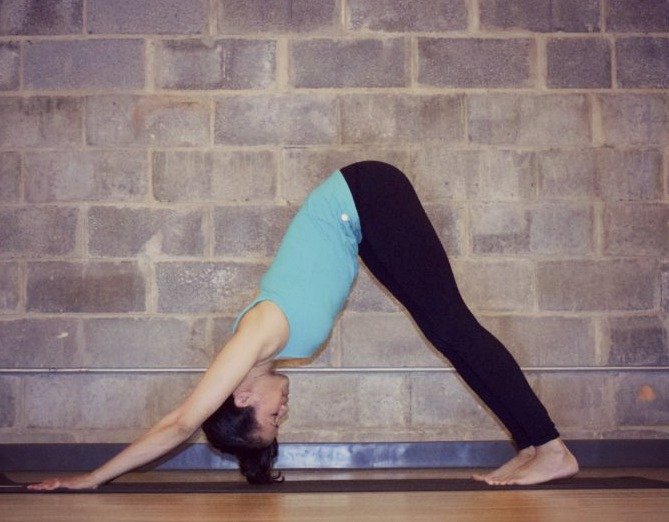
Why this pose: Downward-facing dog helps to stretch the back of the legs; the hamstrings, calves, heels, and even the soles of the feet which tend to get tired after a long day of standing or walking, especially if you live in the city. It helps to lengthen the spine and sides of the torso after long hours of sitting, as well as the shoulders and hands. Lastly, it is a mild inversion so it is slightly calming and can also relieve mild headaches.
How-to: Begin in hands and knees, with hips aligned over the knees, and shoulders over the wrists. Tuck the toes under and move your hands about 8-10 inches forward and ahead of the shoulders. Spread the fingers and press down evenly through the palms of your hands. Lift your knees and extend the legs as you lift the hips up and back. Press the tops of the thighs and shins back, and actively reach the heels down towards the floor. Keep spreading the fingers wide and press away from the floor with your hands to help lengthen the torso. Stay for about 5-10 long, even breaths.
Modify: If the hamstrings are tight, keep knees slightly bent, and feet wider than hip width. Keep pressing through your hands and taking the hips back as you bend your knees. This will also help to take weight away from your wrists.
Child’s Pose (Balasana)
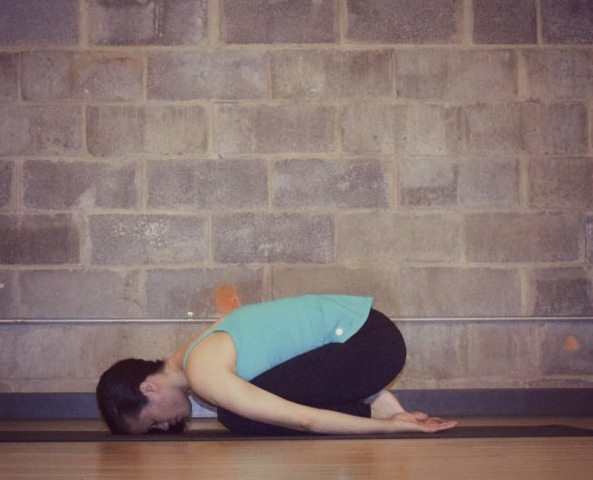
Why this pose: This is one of my favorite poses to do either at the beginning of the day, or at the end. It is a mild hip opener and helps to relieve tension headaches. And because it is a forward fold, it gives the opportunity to go inwards by closing the eyes with nothing to see but your inner-self.
How-to: From downward-facing dog, lower your knees to the floor, then your forehead. Stretch your arms in front of you or keep the back by your sides (as shown), and let your hips rest over your heels. Keep your knees either close together, or as wide as mat (wider than hip width). Close your eyes and breathe. Stay for about 10-20 breaths or longer.
Modify: Place a blanket or towel under your knees for support. If you still experience discomfort in the knees, you can keep the hips higher so there is less flexion at the knees. You can also experiment with placing a block under the forehead.
Bridge Pose (Setubandha-sarvāṅgāsana)

Why this pose: Backbends are great to do at the end of a long day because they help counteract the effects of sitting for a long time and most of the things we do on a daily basis like reading, texting, driving, computer work, etc. Bridge pose helps open the chest, stretch the hip flexors, calm the mind and alleviate stress. It also provides a slight shoulder stretch, especially if you interlace the hands underneath.
How-to: Lay down on your back, with your knees bent, and feet on the floor. Keep the toes pointing forward, knees over ankles, and knees aligned with the hips. Keep your arms by the side body, with your fingers pointing towards the heels. Press firmly through the feet and hands and engage your lower abdominals. On an inhale, lift the hips so that the frontal hip bones reach towards the ceiling. Keep pressing through the inner feet to avoid the knees from splaying out. Stay for 5-8 breaths, or as long as it is comfortable on the spine.
Modify: Sometimes when we don’t engage the muscles of the legs and abdominals in backbends, we can experience discomfort in the low back. If you are just starting out with backbends, or prefer a more restorative option, lay down on your back as described above, lift the hips and place a block or a stack of books under the sacrum (the flat/bony area located at the base of the spine). Keep your arms by your side and relax, close the eyes, and breathe.
Reclined Twist (Jathara Parivartanasana)
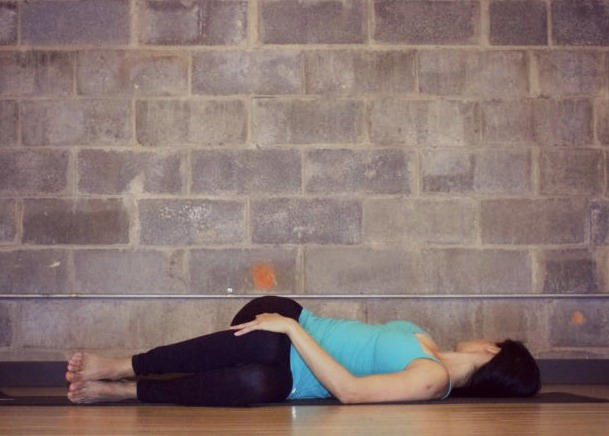
Why this pose: The twisting action helps to mobilize your spine and massage internal organs around the abdominal region. It also stretches the abductors, obliques and shoulders.
How-to: Lay on your back and bring your knees to your chest, wrapping your arms around your shins as if you were giving yourself a big hug (this also serves as a back massage). Place your feet on the floor as if you were going to do bridge pose, lift your hips and turn them to the left a few inches. Then, turn the knees to the right, resting them on the floor and in line with your hips. Extend the arms out into a T shape, as you roll the ribs towards the left. Gaze over your left shoulder. Relax into the pose, close your eyes, and stay for 1-2 minutes. Return to center and repeat on the other side.
Modify: Keep your gaze towards the ceiling if you experience discomfort around your neck as you gaze over the opposite shoulder. Place a towel, blanket, or block under the bottom knee if it doesn’t reach the floor comfortably.
Legs Up the Wall (Viparita Karani)
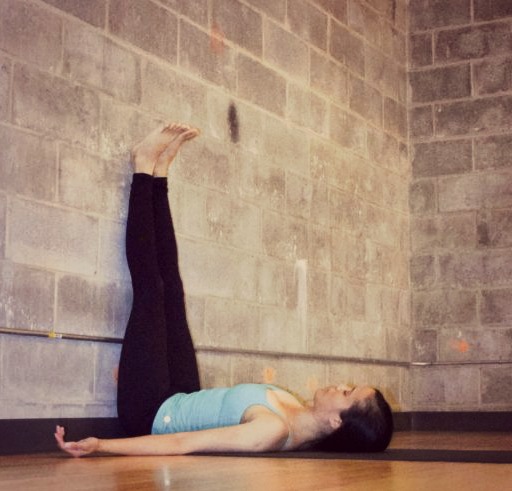
Why this pose: This is the ultimate, all-time favorite pose for hitting the refresh button. I do legs-up-the-wall after a long day and right before teaching my evening classes. It helps to relieve stress and anxiety that may have accumulated throughout the day, but also in general. It helps to rejuvenate tired legs and feet, and it is so calming to the nervous system. This pose has so many wonderful benefits and I could go on forever. So go ahead, give it a try and see for yourself.
How-to: It may feel a little awkward coming into this pose at first. That’s ok. You’ll get used to it. Sit on the floor with the right side of the body pressed up against the wall. Place your hands behind you a few inches and swing your legs up the wall. If your sitting bones aren’t close to the wall, use your hands to move closer to the wall. Lay your torso on the floor so that you’re making a 90 degree angle with your legs against the wall and torso on the floor. Relax your arms by your side and close your eyes. Stay for about 5-10 minutes.
Modify: Elevate your torso by placing a bolster, blanket, or towel under your hips. Wrap a strap around your legs for support or for tight hamstrings.
Optional: Although legs-up-the-wall is an excellent way to end a practice, you can always finish-up by laying down in a traditional Savasana. To come into the pose, lay down on your back with your legs and arms open into a V. Relax and feel as if you’re sinking into the floor.